Let me tell you, fellow Rovers, as a veteran who has scoured every inch of Sol-III, the Data Bank in Wuthering Waves isn't just a menu option—it's my sacred war room, my command center, my absolute lifeline for dominating the Tacet Fields! I've poured countless hours into this masterpiece from Kuro Games, and I can confidently say that understanding the Data Bank is the single most important skill separating casual players from true legends. Forget just swinging your sword; true power lies in knowledge, and the Data Bank is the ultimate repository of that power. It's the difference between stumbling in the dark and striding through the apocalypse like you own the place!

The Data Dock: My Engine of Unstoppable Power!
The Data Dock is, without a shadow of a doubt, the beating heart of the entire system. This is where I forge my destiny! Every single point of Data Dock XP I earn feels like injecting pure adrenaline into my account. Leveling up here doesn't just give me a pat on the back; it unlocks game-changing upgrades that fundamentally alter how I play. We're talking about increasing the Class Cost Limit for my Resonators—do you have any idea how monumental that is? It means I can equip heavier, more devastating Echoes, transforming my characters from soldiers into gods of the battlefield! The rewards are insane: Astrite, materials, and passive buffs that make the entire Echo ecosystem bow to my will. I check my Data Dock Level more often than I check my own pulse!
But wait, there's more! The Data Dock also displays three critical stats that I monitor like a hawk. My Base Drop Rate determines if a defeated foe even considers leaving an Echo behind—I've maxed this out to ensure they have no choice! The Enhanced Drop Rate dictates my chances of snagging that glorious, shimmering highest rarity Echo from a fight; seeing that golden light is a feeling better than any victory screen. And the Max Absorbable Rarity? That's the ceiling of my power. It tells me the absolute best Rank I can possibly obtain, pushing me to hunt stronger foes to raise it ever higher. This trio of stats is my personal report card, and I demand straight A's!
The Echo Gallery: My Trophy Hall of Conquests!
Ah, the Echo Gallery. Calling this a mere "Pokedex" feels like an insult. This is my hall of fame, my meticulously curated museum of every creature I've ever dominated and absorbed! Scrolling through this gallery is a trip down memory lane—every Glacio Dreadmane, every Havoc Rover, every Chasm Guardian I've claimed. For each Echo, I can marvel at its details:
-
Class & Cost: The blueprint for where it fits in my loadout.
-
Echo Ability: The unique, often devastating skill it grants me.
-
Sonata Effect: Its team-play potential.
-
Data Dock XP Log: A proud record of every Rank I've collected.
The real endgame obsession? Completion. Each Echo type has four Ranks, from 2 to 5. My goal? To fill every single slot. The beautiful system is that catching a higher Rank (like a glorious Rank 5) automatically fills in the lower, missing Ranks for that Echo. It's a constant, addictive hunt for perfection that keeps me exploring every corner of the map. This gallery isn't just a list; it's a testament to my dedication and power.
The Sonata Gallery: My Strategic Mastermind Playbook!
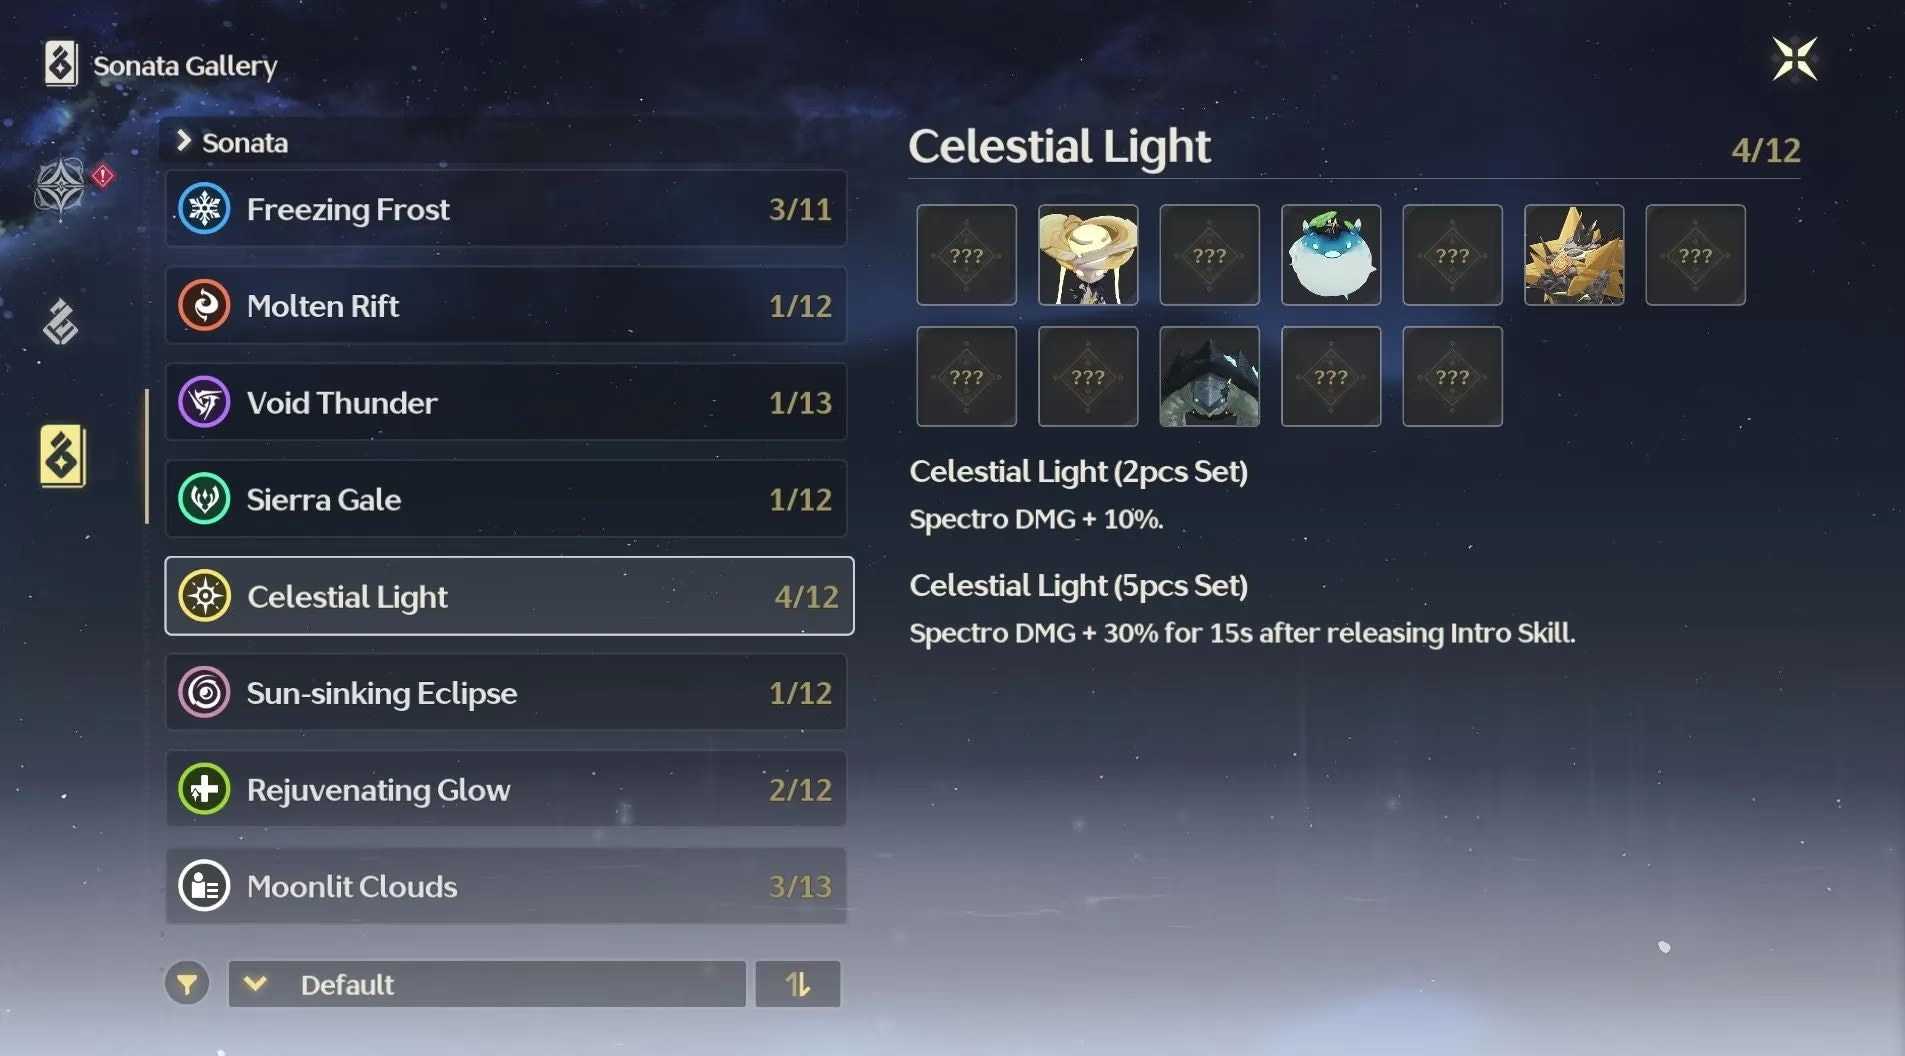
If the Echo Gallery is my trophy room, the Sonata Gallery is my war room strategy board. This is where I plan my team's synergy, where I craft builds that break the game's meta! The Sonata Effects are the set bonuses, the secret sauce that turns a group of strong Echoes into an unstoppable, coordinated army. The gallery lays out all nine Sonata Effects with crystal-clear descriptions. Need a 20% boost to Havoc damage? The Havoc Reprise set is your answer. Want to spam your Resonance Liberation? Moonlit Clouds reduces its cooldown dramatically.
The genius part? It doesn't just tell me what the sets do; it shows me exactly which Echoes belong to each set and—crucially—whether I own one! When I'm theory-crafting a new build for my main DPS, I don't have to guess or trawl through my inventory. I jump straight to the Sonata Gallery, see which sets I can activate with my current collection, and plan my next farming target. It's an indispensable tool for any player who wants to move beyond random equipment and into the realm of calculated, overwhelming power.
My Daily Ritual & Pro-Tips for Domination!
This isn't just a one-time visit. Engaging with the Data Bank is part of my daily ritual in Wuthering Waves. Here's my personal checklist:
-
Log In: First thing, I check my Data Dock. Any XP close to leveling up? Time to hunt specific Echoes to push it over the edge.
-
Review Stats: I glance at my three key rates. If my Enhanced Drop Rate feels low, I know it's time to focus on leveling the Data Dock.
-
Plan the Hunt: I open the Echo Gallery, find the Echoes where I'm missing higher Ranks, and mark their locations on the map. Targeted farming is key!
-
Theorycraft: Before spending precious resources, I visit the Sonata Gallery. I ask: "What's the best 5-set combo I can make with my current roster?" This saves me from costly upgrade mistakes.
My final, most important tip? Don't ignore it! I've seen so many players struggle because they treat the Data Bank as a boring menu. They are missing the entire point! This system is a dynamic, rewarding progression layer that directly feeds into your strength. Every Echo you collect makes you stronger twice: once as equipment, and once by leveling your Data Dock for permanent account-wide buffs.
In 2026, with the game more evolved than ever, mastering the Data Bank is non-negotiable for anyone who wants to be competitive. It's the deep, strategic core that elevates Wuthering Waves above other games. So get in there, study it, worship it, and use it to unleash your true potential upon the world! Now, if you'll excuse me, I have a Rank 5 Inferno Rider to hunt—my gallery won't complete itself!